Hello friends,
in Fotogario We continue to delve into the fundamentals of photography. This time we delve into light measurement and its control through our camera's parameters to obtain correctly exposed images. Understanding the concept of law of reciprocity It's the first step. Do you want to overcome your fear of these strange concepts? Then join me in these articles dedicated to understanding light metering and proper exposure for your camera's sensor.
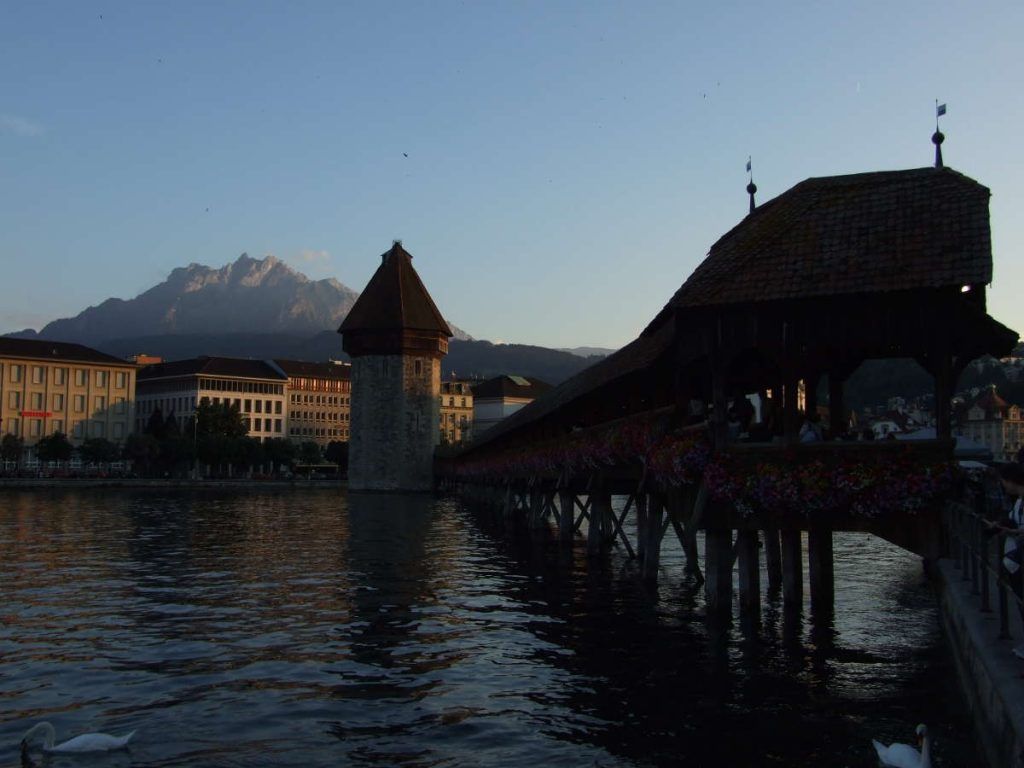
Understanding what light is in photography and mastering concepts such as light measurement, exposure, light meters, and histograms is no easy task. But it's essential if we want to take good, correctly exposed photographs. It's not just an aesthetic factor; in the age of digital photography, properly exposed images allow us to obtain the maximum amount of information from the scene. An underexposed image, like the one above, will lose information in the dark areas. If we look at the bridge in this well-known Lucerne print, we'll see that the area inside the roof is so dark that we're unable to appreciate the colors and patterns painted on the wood.
We can try to fix the image in post-editing, but the information in the dark areas has been lost in the original shot. Even if we improve the curves and levels with photography software, we won't see anything in that area inside the roof. Nor will we see the people inside the bridge any better.
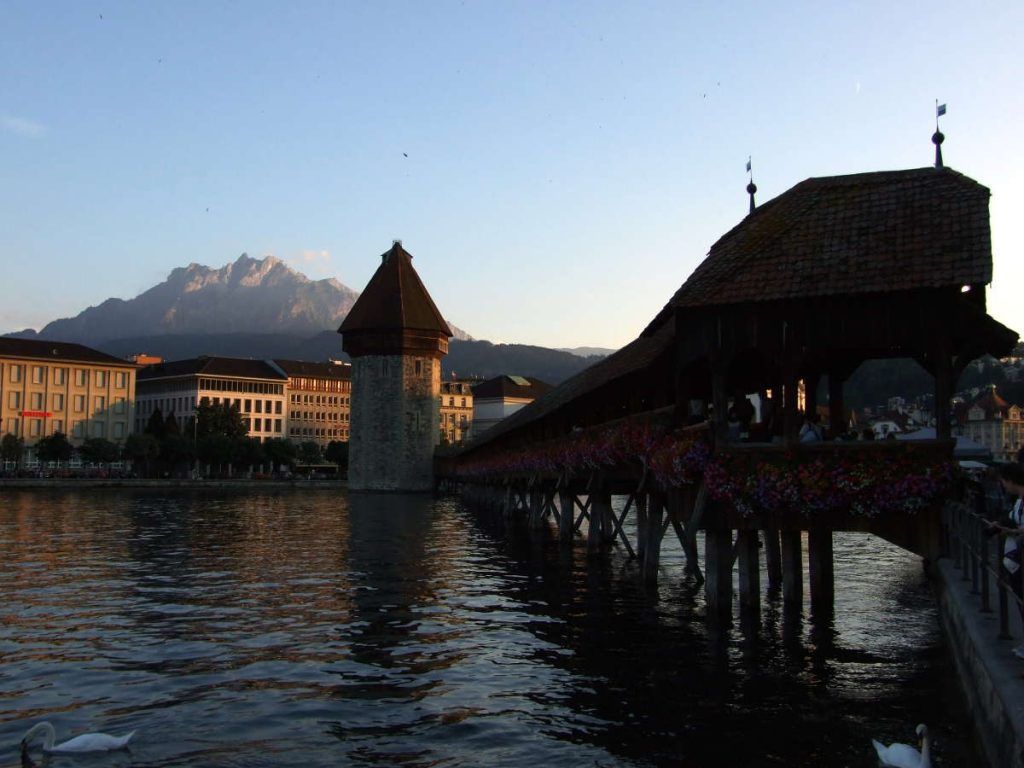
A camera's dynamic range tells us the amount of dark and light tones it can detect and capture in a single photograph. In other words, it's the camera's ability to capture details in the lightest and darkest areas of a photograph.
In the previous photograph, we saw that the camera was unable to capture details in the darker areas of the bridge. That doesn't mean our camera is bad, or that it doesn't have enough quality to properly capture a photograph in extreme conditions. Possibly, in the previous photograph, the scene's light was metered and exposed just enough to avoid blowing out the blue sky (and leaving it white), losing information in the dark areas. As a landscape, it's not a bad photograph, but if the most important aspect of the image was to highlight the people on the bridge, it certainly wasn't achieved.
In short, a camera with a wide dynamic range will give us more information and better sensitivity to detail than a camera with a lower dynamic range. But a wide dynamic range is not enough to make our image good. A poor choice when it comes to expose can ruin a photograph.
Exposing is allowing light to fall on the camera's electronic sensor. Many people think that exposure is simply the time we allow light to pass through, but it's actually a combination of several parameters, which we've discussed before:
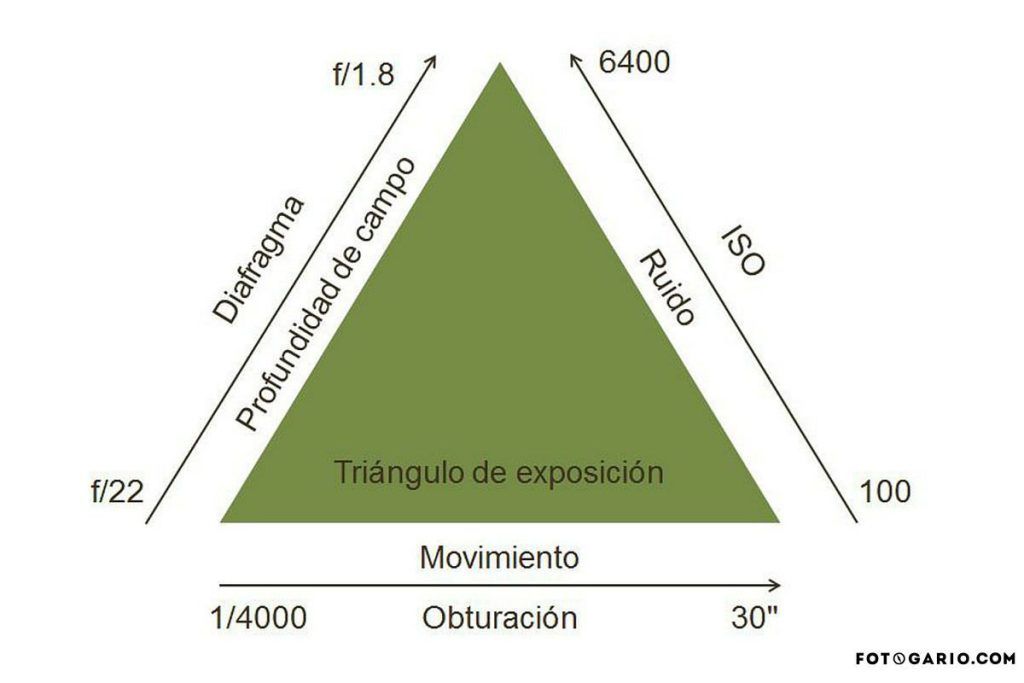
By combining these three parameters, we can solve almost any photography situation. In action sports, we'll slow down the shutter speed to freeze the image, so we'll have to balance by opening the aperture (losing depth of field) or increasing the ISO (generating more noise in the image). On the other hand, if we want to photograph a beautiful landscape, we'll stop down the aperture and increase the exposure time. In night photography, we'll have to increase the ISO to capture more light.
How do you manage these three variables to accurately present your results? At first, it will be a matter of practice and experimentation, but little by little, we will get used to quickly calculating the combination of the three parameters. Fortunately for us, exposure triangle It allows us to set one of the parameters and combine the other two using a simple mathematical rule: the law of reciprocity.
This simple rule allows us to combine these parameters two by two (leaving the value of the third fixed) to obtain the same image, with the same exposure, by means of the mathematical rule of the doubles and halvesI think the best way to understand the law of reciprocity is to use an example:
If we leave the ISO at a fixed value and photograph, for example, a landscape with a combination of f/8 and a shutter speed of 1/200, we will obtain the same image if we double the shutter speed (1/100) and stop down the aperture (f/11). Both photographs will be identical and will be exposed to the same amount of light.

Similarly, if we divide the shutter speed in half (1/400) we will have to open the diaphragm to f.4 to obtain a photograph exposed with the same amount of light.
This rule works the same way if we leave any other parameter fixed. For example, if we leave a fixed value for the aperture, we will obtain the same photograph, with the same exposure, by combining the ISO and shutter speed values as follows.
 We get the same image at ISO 100 and speed 1/50 as at ISO 200 and speed 1/100, etc. If we double one of the values we will have to divide the other in half.
Finally, if we leave the shutter speed value fixed, the same rule works for the combination of aperture and ISO.

As you can understand, the law of reciprocity is very useful if you know how to use it. Knowing in advance what type of photography you want to do (action, sports, landscape, night photography, etc.) you can configure your camera's parameters to get a correctly exposed image. If I want to stop the movement of a bird in flight I'll set a very fast shutter speed (1/1600, for example). To avoid a dark photo, I'll have to combine high ISO values with large apertures.
Friends, this has been the first installment of a triad of articles on how to understand light and how to properly expose a photograph. Don't miss the next article in which we'll reveal more about that great unknown: histogram.
Greetings and have a nice week.