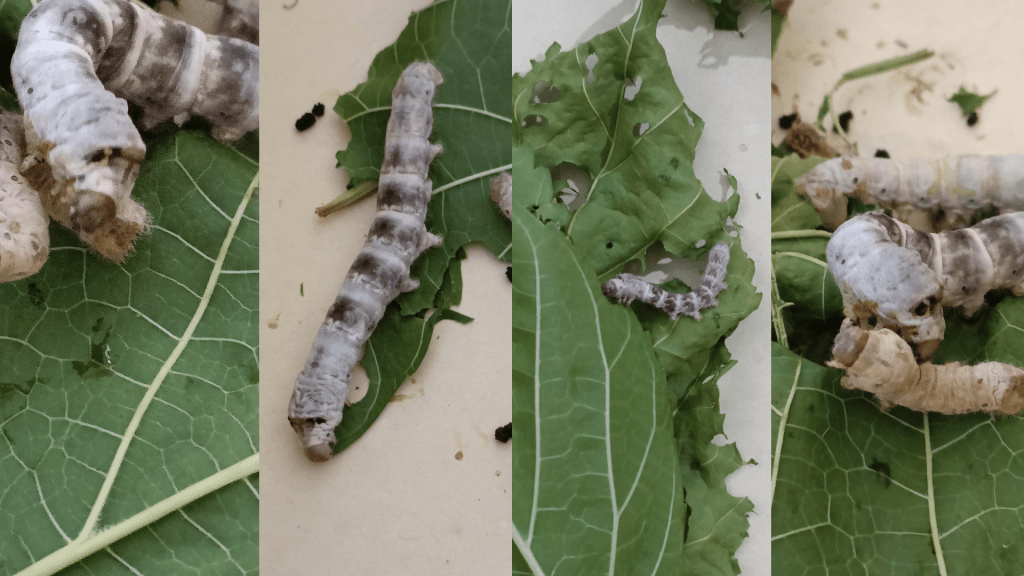
Hello friends,
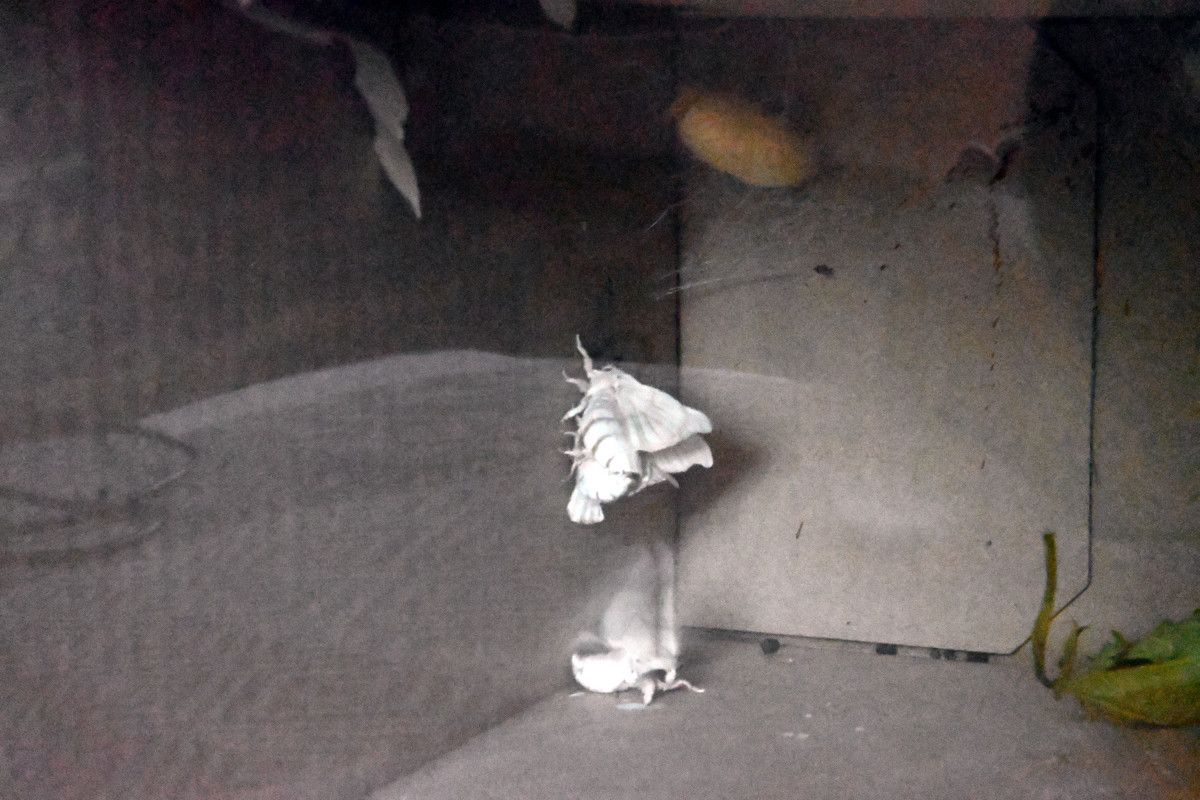
Between the months of May and June I have been able to observe first hand what the life cycle of the silkwormI'd never done anything like this before. I'd never worked with or photographed insects. And when the opportunity arose to see the silkworm's metamorphosis, I immediately designed a small stage, a mini photo studio from which to photograph and film the process. Want to see how I did it and what happened during these two months?
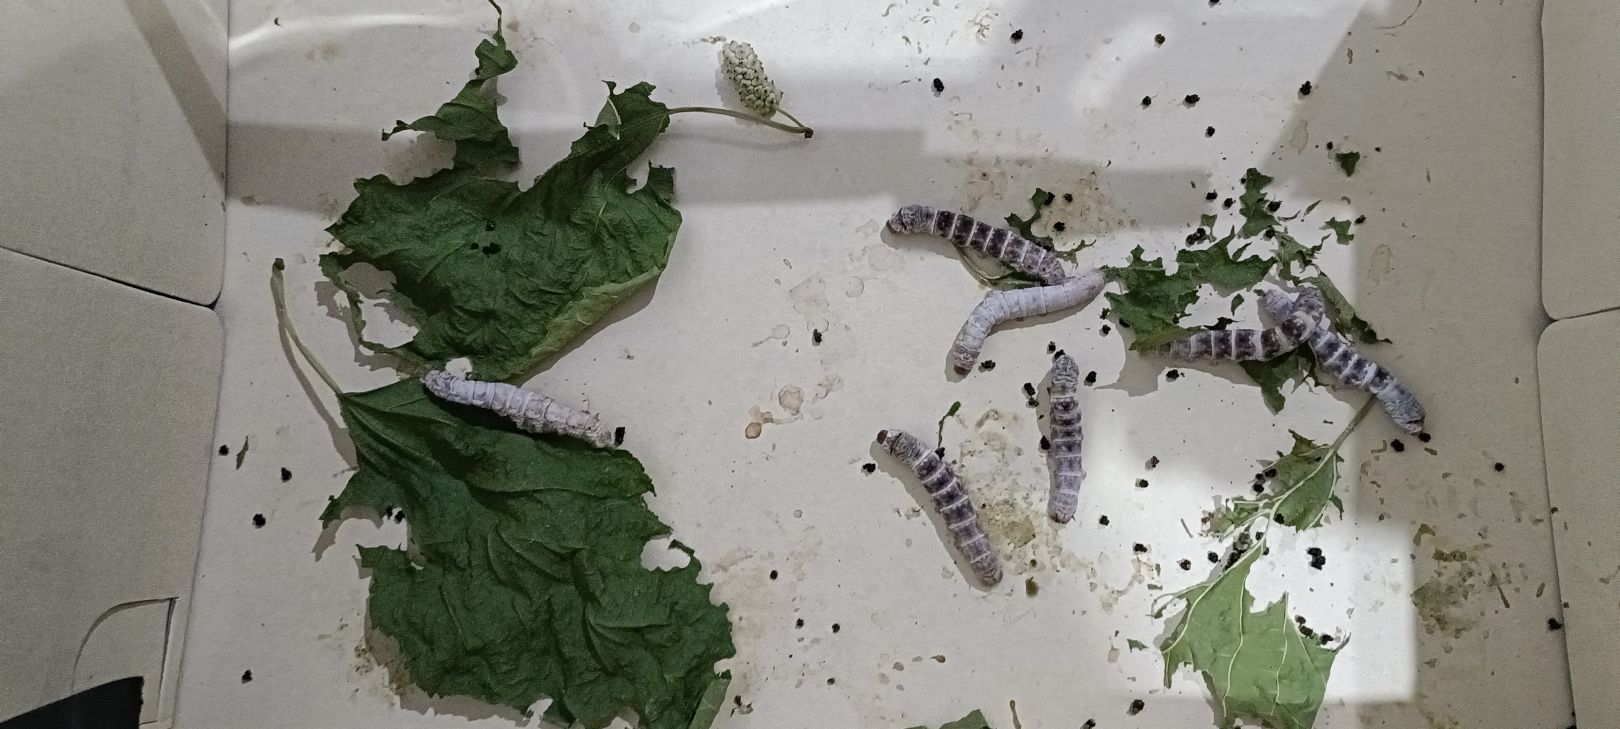
Well, yes. This spring of 2023, I had the opportunity to work with these well-known insects for a couple of months. I suppose if you have children at home, you've seen them before. I have to thank my friends Olga and Alba for lending me several unhatched eggs to follow the whole process, everything. the life cycle of the silkworm.
To do this, once I had the eggs in my possession, I designed a small scenario, a photo studio that was suitable for the worms, but at the same time allowed me to photograph and film their various changes from the larval stage to the moth.
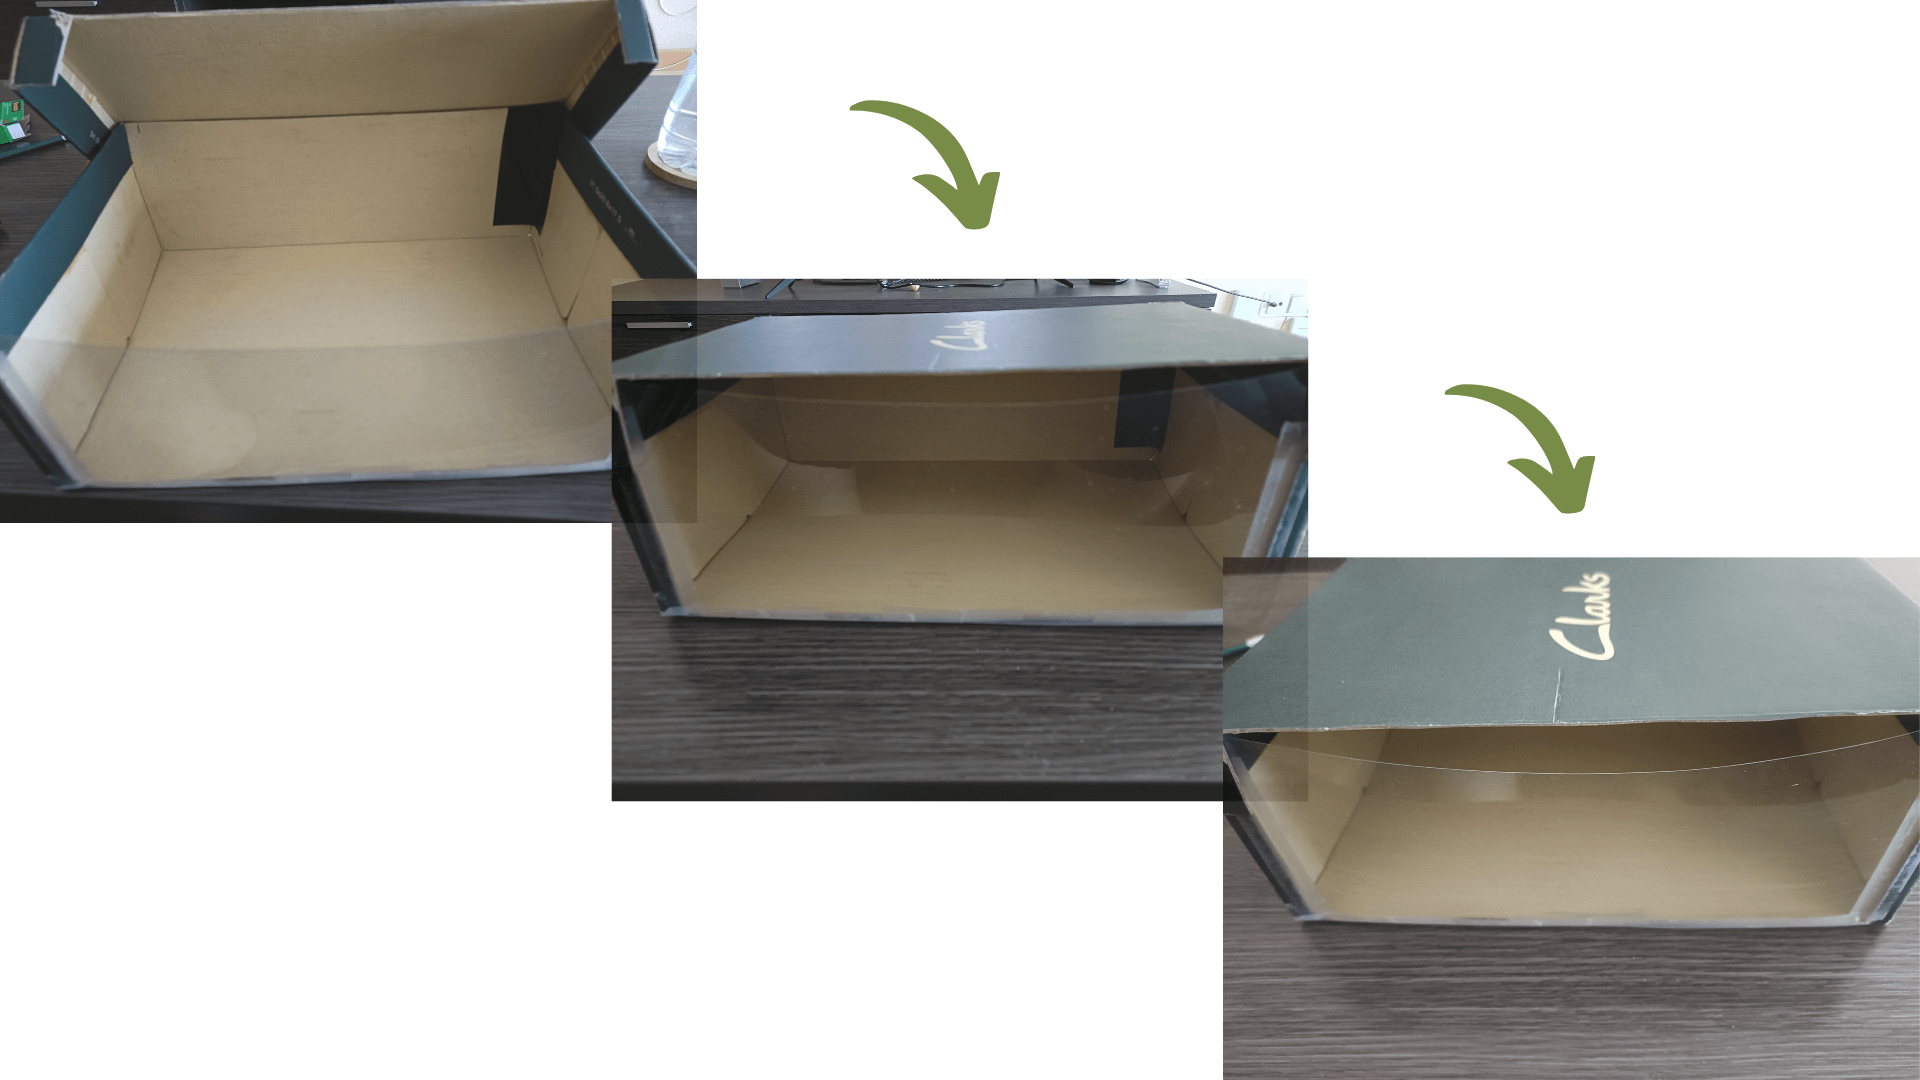
The idea was simple. Normally, worms are kept in a shoe box, to which we regularly add mulberry leaves to feed them, and from time to time we clean the box. So my original idea was to replace one side of the cardboard box with some kind of sheet of transparent material, which would allow me to take photos, but flexible and strong enough to replace cardboard.
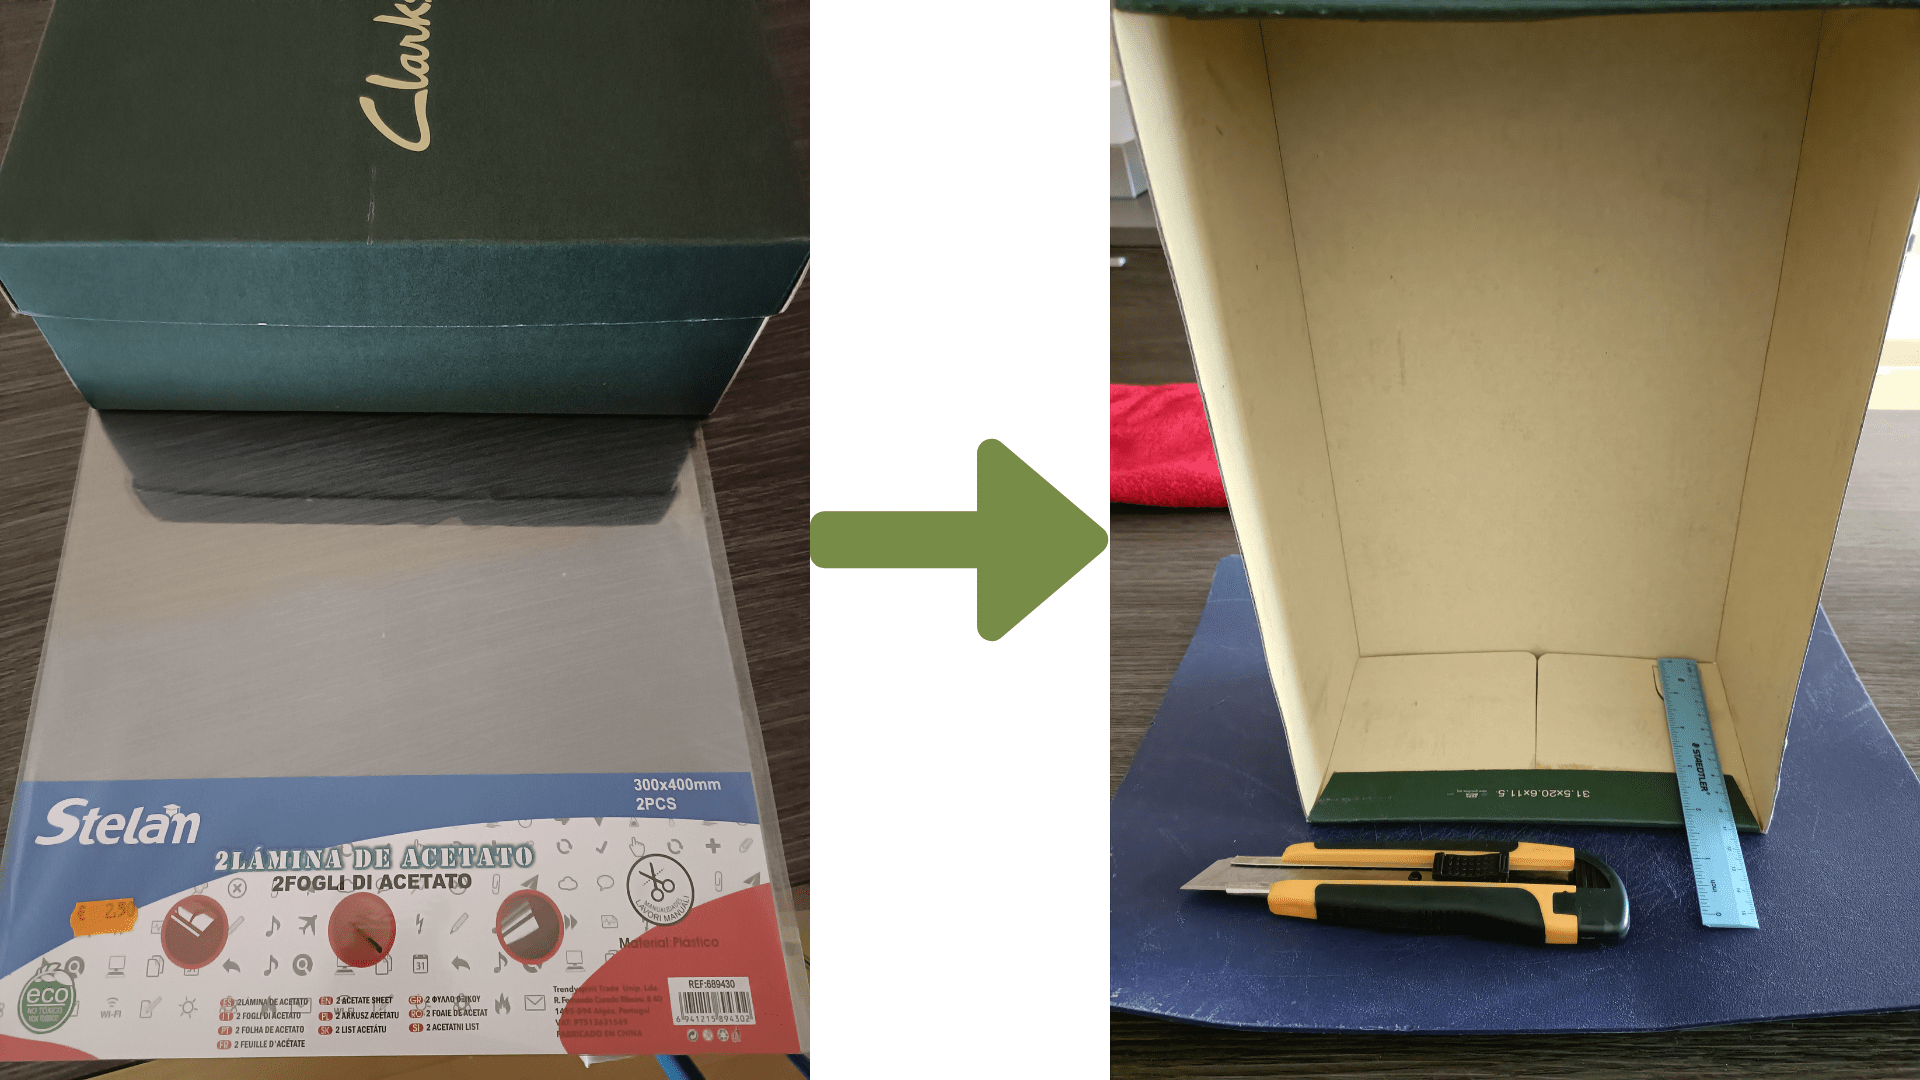
And with these very basic materials and a little skill, I transformed a shoebox into a photography and film set. I'm sure I could have focused more on the details, but my intention wasn't to make something very professional; quite the opposite. It was about making something anyone could replicate with a few common materials. A classic DIY project.
Silkworm life cycle, the 4 phases
Now that the set is ready, let me tell you a little more about the different stages of silkworm metamorphosis. Silkworms go through 4 phases of development, like other caterpillars. These stages are: egg, larva, chrysalis (also called pupa) and imagoBut let's take a closer look at these phases and what I was able to observe with my own "SEDA Project."
Stage 1: Bombyx mori eggs
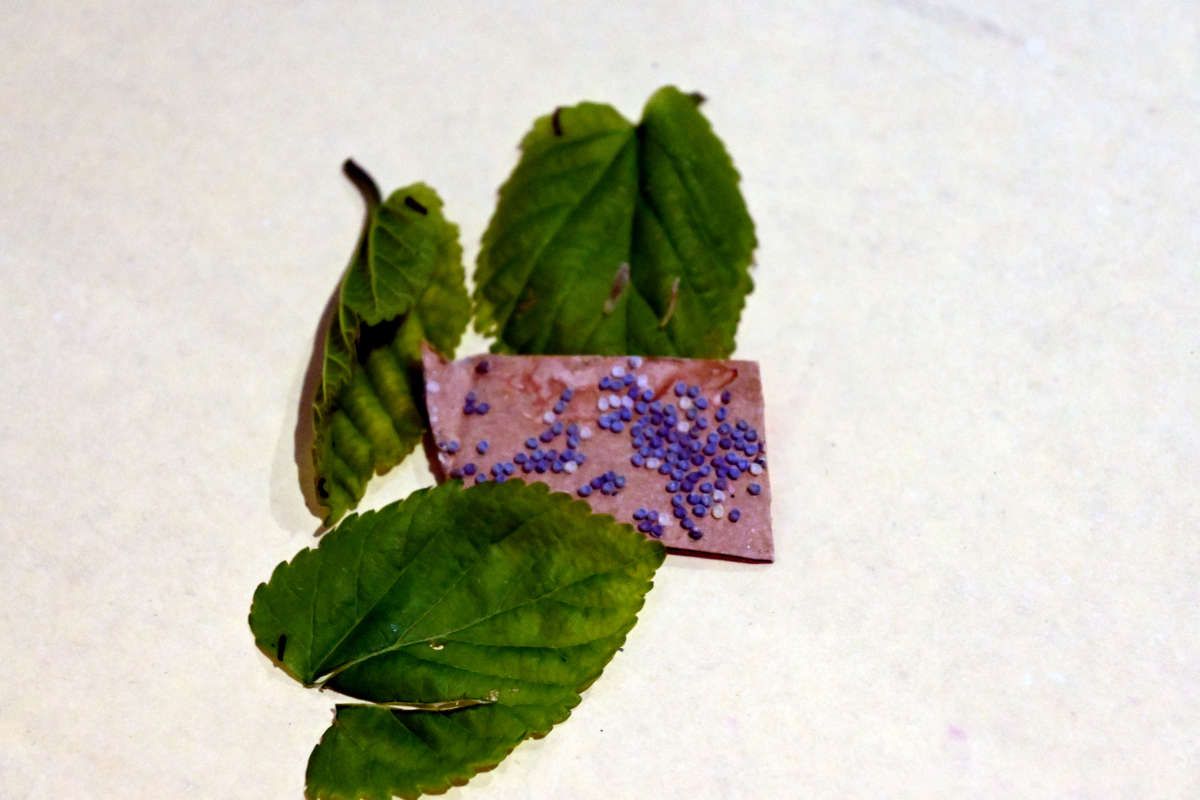
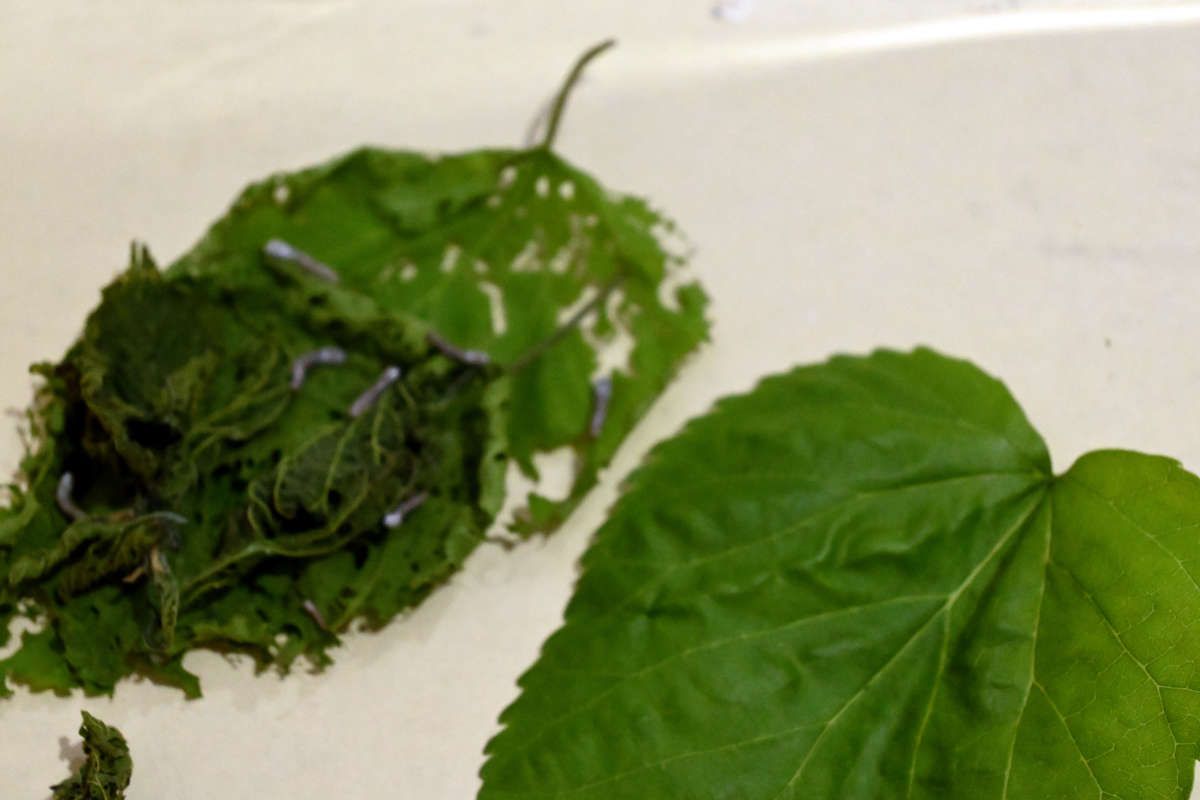
I selected this photo because it shows very well what silkworm eggs look like and what you can expect if you don't know what they look like. Let me explain. What you see between the mulberry leaves is a piece of cardboard which can be 2x2 centimeters in size. What's in the cardboard are silkworm eggs, which can be between 1 and 2 mm in diameter.
Regarding color, I've read a lot, and I'm not exactly a great expert on insects. From what I've come to understand, the darker the eggs, the more fertilized eggsThe lightest eggs (white or yellowish) are unfertilized eggs. When the eggs turn a greenish color, they're about to hatch (open, in other words).
I can tell you I've never seen greenish eggs. In fact, what I observed were two basic colors: white and blue. Obviously, some of them hatched, as you'll read later, but let's not get ahead of ourselves.
Day 1, Project SEDA officially begins. Three hours ago, I was given a small piece of cardboard the size of a matchbox filled with tiny gray eggs.
In those 3 hours, and after placing 3 mulberry leaves, we already have the first worms that have hatched. (published in Facebook March 30, 2023)
The eggs usually begin to hatch with the arrival of spring, the rise in temperature, and usually coincide with the appearance of the mulberry leaves on the tree itself. Although you already know how crazy the weather is and if we live in the city it is difficult to control when the mulberry trees begin to bloom... In my case, I received the eggs on March 28th or 29th and some had already begun to hatch, so if we have eggs at home and we check on them from time to time, we have to have mulberry leaves ready for those dates because as soon as they hatch they need to eat.
Stage 2: larvae or silkworms
After leaving the egg, the larvae begin to eat and that is the only thing they do in a period that spans from the 4 to 6 weeks, maybe even more, since worms are very sensitive to changes in environment, temperature, etc.
At this stage, a warning must be given. The larvae, or silkworms, only eat mulberry tree leaves. They don't eat lettuce (they're not snails) or other types of vegetables. THEY ONLY FEED ON MULBERRY LEAVES.
So, you need a constant supply of leaves for a couple of months to feed them. And of course, I'll never recommend that you defoliate your city's urban gardens. It's best to go to a herbalist or a nursery to get the food.
In my case, the worms increased in size until they were almost 8 weeks old. Although I have to admit that in the last few weeks, many of them suffered a possible pesticide poisoning in the mulberry leaves, and almost all of them died. The few that survived lost their appetite for several days, stopped growing, and became much smaller than other worms that had hatched at the same time but had grown in another box, fed on other leaves.
So in mid-May, after talking to several friends and realizing that many of us had suffered from this poisoning, my friends Olga and Alba were kind enough to give me 3 or 4 worms from a box that had not had any contact with pesticides.
During the last few weeks of May, I was able to directly observe the growth and final stages of healthy worms and those that had been poisoned. The latter were smaller, ate at a much slower pace, and behaved erratically. You can see how applying a simple fungicide to our garden plants and flowers can affect the insects and small mammals that live there... so it's a matter of thinking twice before being generous with insecticides and pesticides.
Phase 3: formation of the chrysalis or pupa
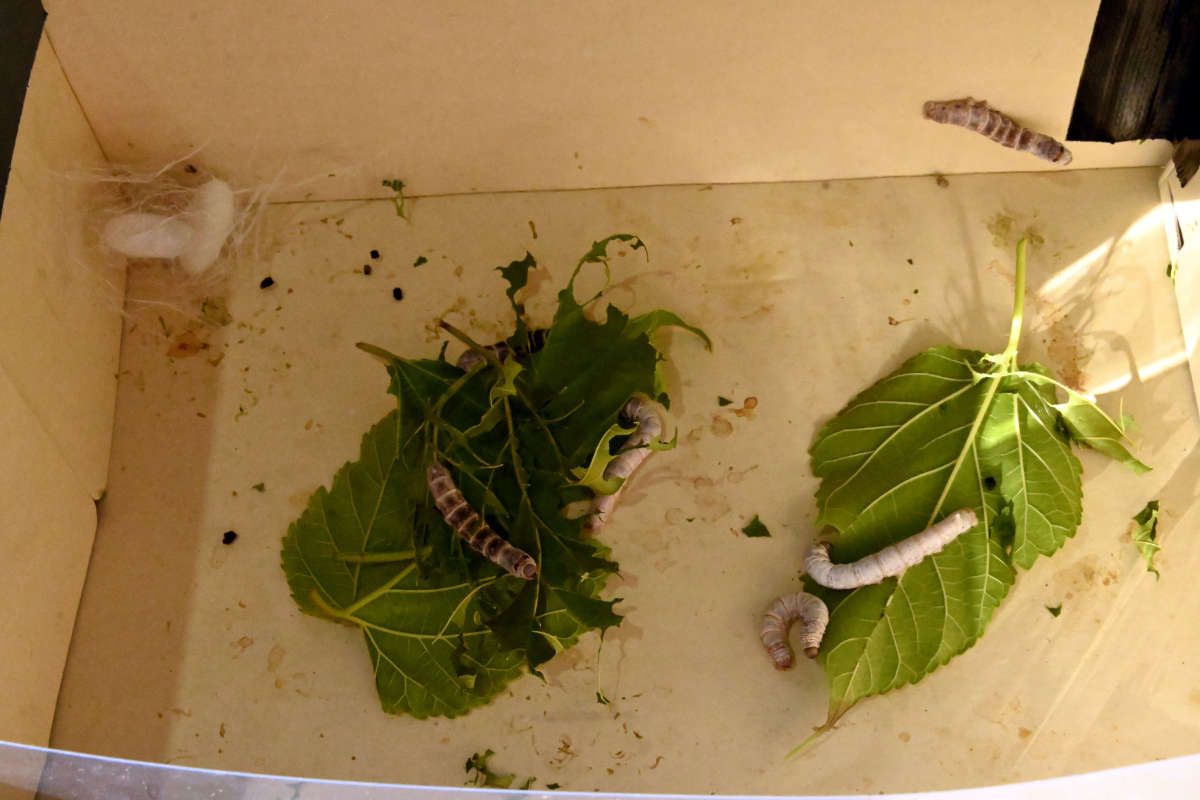
After all this journey, I found myself with two boxes of worms, growing at different rates. And finally, at the end of May, the larger worms, at a more advanced stage of growth, stopped eating and began wandering around the box, climbing the walls. Something they hadn't done before.
These worms began to form the chrysalis in the top corners of the box, hidden from view. Only a few remained in the bottom corners, like those in the previous photograph.
The fact is that almost two months had passed, more than seven weeks. We had suffered a pesticide poisoning, and yet, most of the worms (both healthy and those that survived the poisoning) began to form their chrysalis little by little, each at their own pace, over spaced-out days.
Setting up the photographic set
That's when I finished
the last part of the assembly of the photographic set. Up until now I had taken single photos, every few days, lifting the lid of the box in question. But when the worms began to form the chrysalis, I knew I had to take a
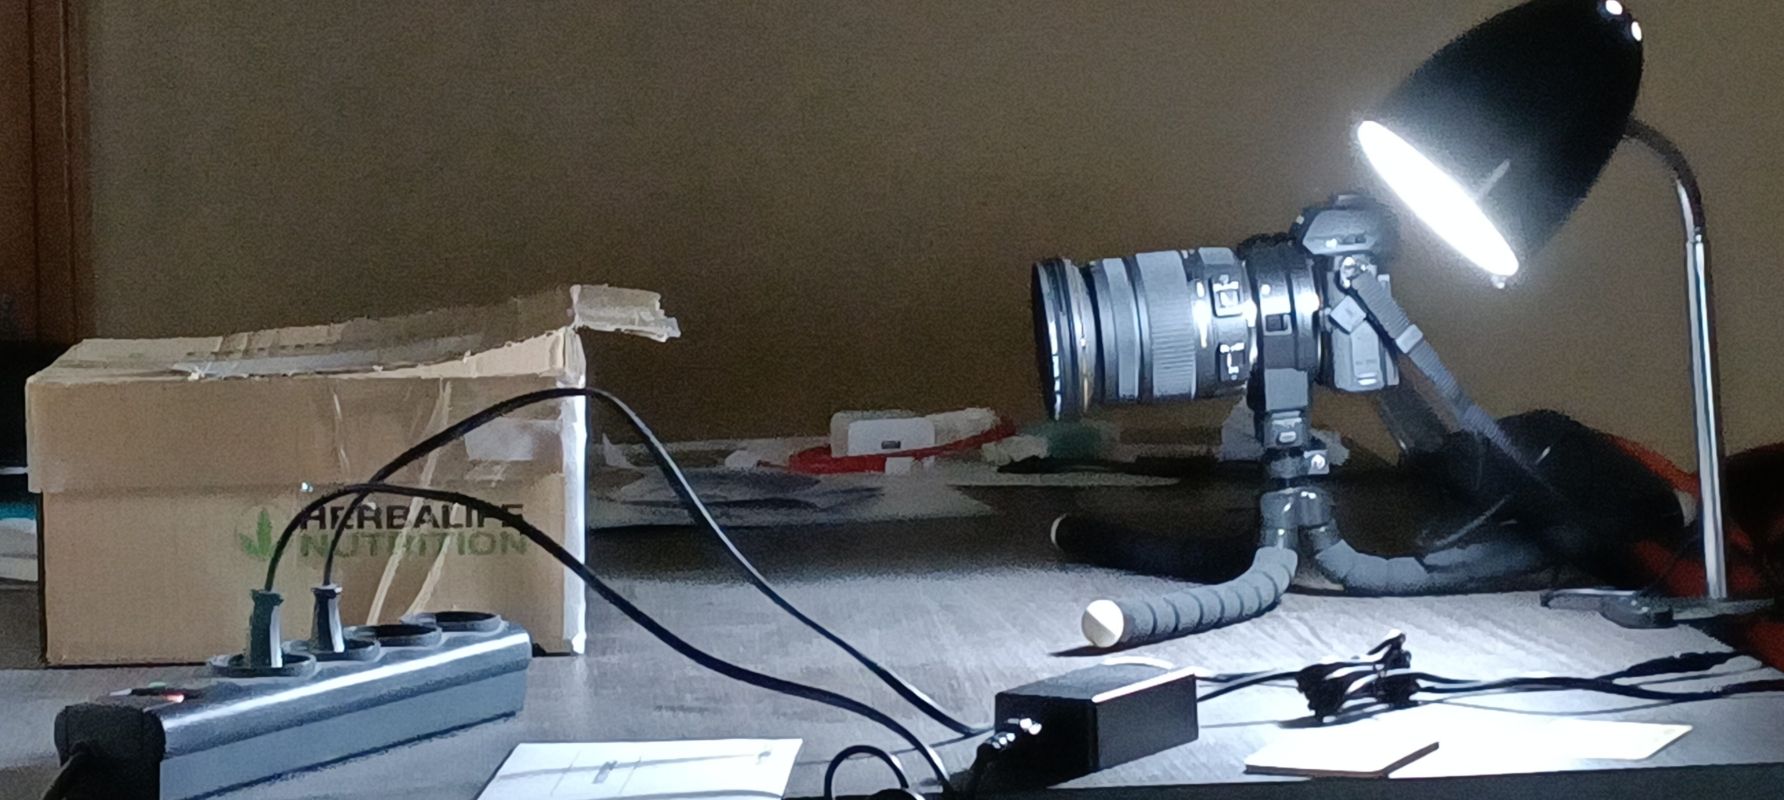
timelapse of the processTo do this, I made sure that a white light focused at a 45° angle wouldn't affect the worms' metabolism or their metamorphosis process. I also looked for a special battery for my camera, which would allow me to keep it powered on and connected to the power supply 24 hours a day, continuously taking photos for the timelapse. The setup looked something like this:
Phase 4: and finally the imago (the moth, let's say)
The chrysalis phase lasted approximately 8 or 9 days. At the end of that time, the chrysalis was torn by the effect of several substances secreted by the egg. moth (imago (the scientific term) and it makes its way back out into the environment it has known since it hatched from the egg.
This last phase as a moth is the reproductive phaseMoths and butterflies no longer feed. They simply focus on ensuring the offspring of the next generation of worms... but there's a trick here too, or at least differences from the reproduction of mammals and birds.
And the moths reproduce and lay a new batch of eggs that will remain in that state until next year, until next spring and the next flowering of the mulberry tree. That's why silkworms are so easy to have at home, especially if there are small children. For two months, coinciding with spring, they hatch, feed, and grow like worms. They then spend a few days as chrysalides (inside their cocoons) before finally spending several days as moths with the sole mission of reproducing. But these new eggs will remain inactive until next spring.
In this final stage, the male and female can be distinguished. I've read on various sites that in the larval stage, males are worms with dark stripes, while females are a uniform grayish color. I've read on other blogs that it's just the opposite: females have dark stripes, while males don't.
In reality, biologically, males and females can only be distinguished in the final stage, when they are moths. Females have a larger, more bulging abdomen. The males are more slender, and from what I've observed, they move much more, even changing position in the box several times, flapping their wings frantically. Although, from what I've observed, I don't think they're capable of flying out of the box and moving across large spaces.
Farewell and closing
Friends, this SEDA Project, which I embarked on two months ago thanks to the help of my friends Olga and Alba, has been something new I've never done before. Working with insects, setting up a small photography set, monitoring the life and growth of these little creatures for more than two months... we've suffered poisonings and deaths, but we've also seen how many of the worms reached the final stage of their metamorphosis, turning into moths and ensuring their offspring.
Everyone, I hope you enjoyed this article. If you have any questions, feel free to contact me anytime. If you'd like to know a little more about the whole process with the worms during those two months, don't miss the video on my YouTube channel: