Hello friends,
I've been neglecting night photography a bit lately. A few years ago I did my first nighttime experiments, about which I published a few articles, but I had somewhat forgotten the technique. Taking advantage of the fact that I'm spending more time in one of my favorite spots, the Alto Tajo Natural Park, which has also received the Starlight rating for skies free of light pollution, I have spent a few days photographing night landscapes and reconciling myself again with some of the night photography techniques. Want to know more?

The idea was simple, on my exploratory trips through the Alto Tajo I had discovered a couple of interesting locations to take night photos, with which stars as protagonists, but always highlighting a object in the foregroundIt's basic: you find an object that remains motionless throughout the night, and place it in the foreground of your frame, so it stands out against the stars.
That's the basic theory, but then you have to take several things into account and calculate well how I'm going to choose and set the camera parameters, so that the photos turn out well, without overexposing (burning) the image, or without underexposing the image (leaving the photo too dark).
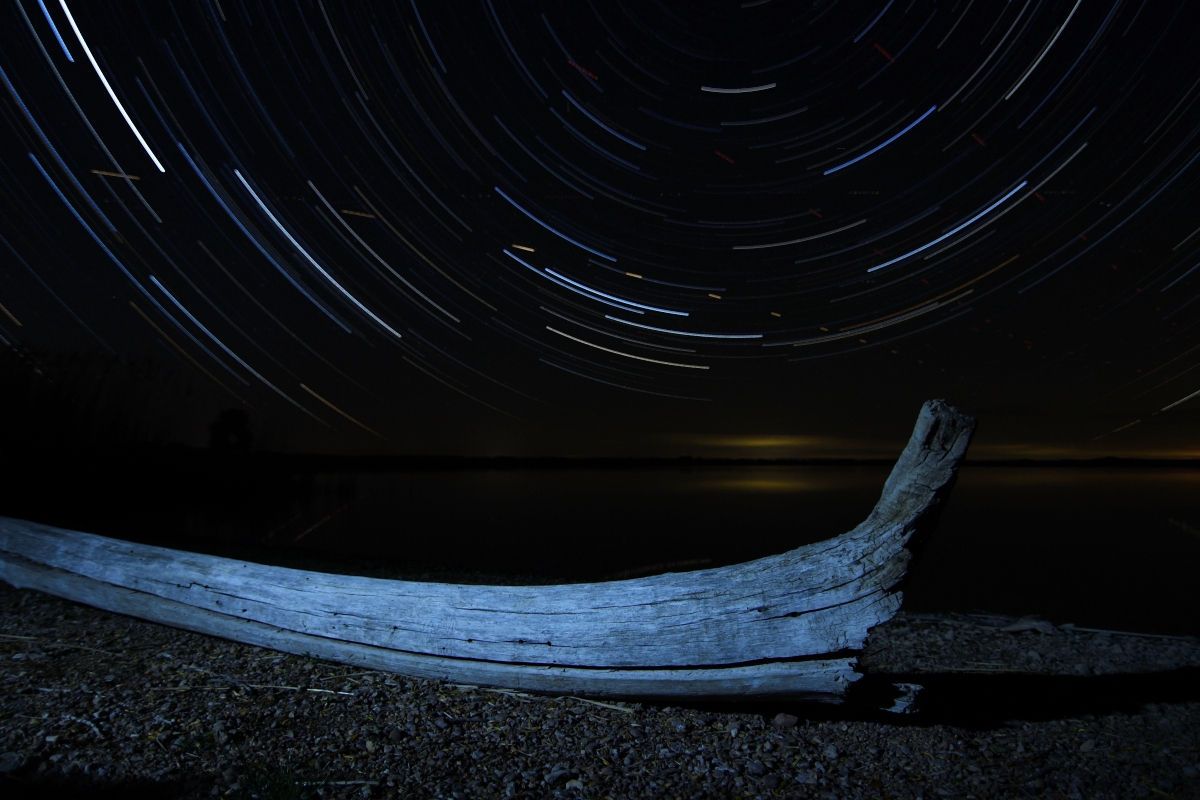
So the first thing I had to do was find two ideal locations for night photography. The first was a small lagoon in the middle of nowhere, which just happened to have an old, dry tree trunk on one of its shores. Even better, I could place the trunk in the foreground of the frame, focusing northwards... looking for the Pole Star.
The second location was very similar, although the lagoon was replaced by several limestone towers that stood out against the backdrop of stars at night.
The next thing was to decide how I wanted to photograph the stars in those two places. There are many techniques and ways to take night photography. It was clear that I wanted to take landscape photography, highlighting the objects in the foreground (the tree trunk or the rock towers) against the starry sky... but How did you want to capture that starry sky?
There are many ways to photograph stars. We can photograph them as static points, as moving trails or traces. These traces can be linear if we focus on the south. We can get curved traces if we focus the camera towards the east or west. Or we can even get circular traces if we focus the camera towards the north. This is what is called fphotography of the circumpolar, and you can read how it's done in This article.
And suddenly I saw it clearly... And why don't I also make a night timelapseThat is, leaving the camera taking photos continuously every few seconds and converting it all into a short video in which we could observe the movement of the Earth relative to the celestial vault. Although the effect actually seen in the video is as if the stars were moving while we stood still.
Said and done, I had my three techniques chosen. But... How do I configure the camera settings for each of them?
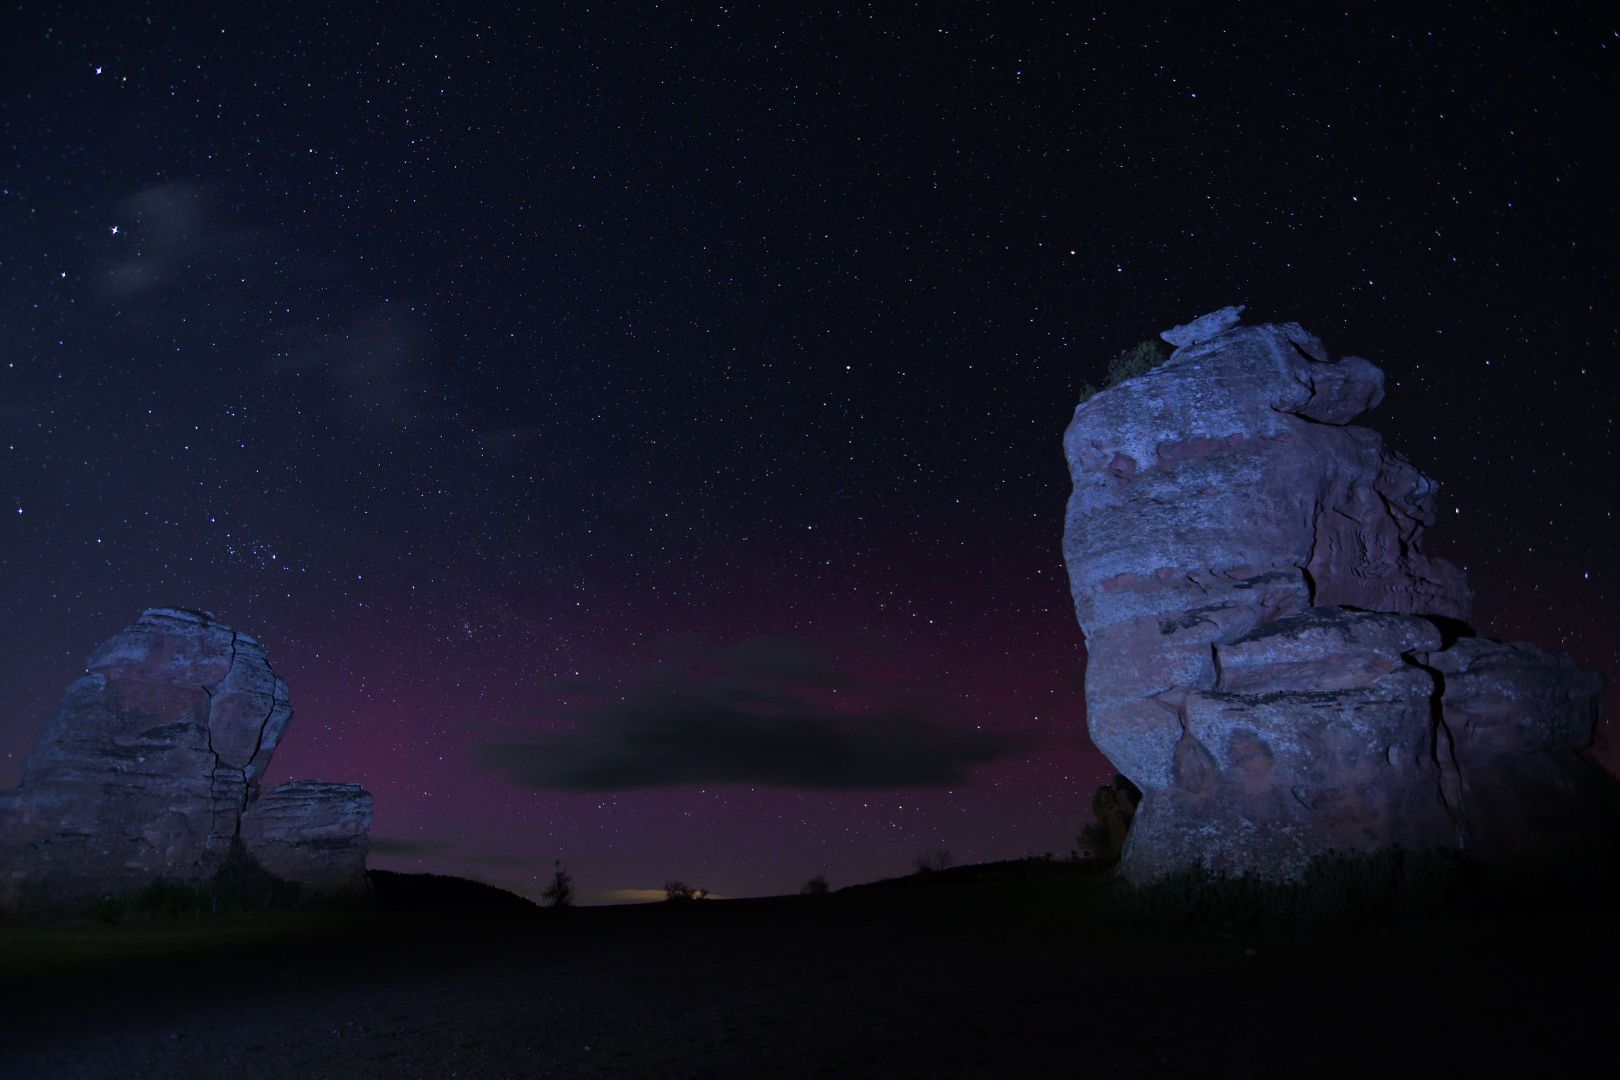
The first technique may seem the simplest, but don't be fooled. It involves taking a single photograph, but to do so, you'll need to do some testing first, varying the camera settings and choosing the right one. how long are we going to expose finallyEvery master has his own way of doing this, so I'll explain the steps I follow, as if it were a recipe, to arrive at the final photo, which is the one you see above.
The first thing I do is choose the foreground subjectWhether it's an old, ruined hut or "payera," a tree trunk, like in the lagoon, or rock formations like in this last photograph. For this photo, I don't care whether I orient the frame to the north or not. What I want is a single final photo with the stars static. Of course, I have to stay as far away as possible from "human" lights that could enter the sensor and burn the image. I have to stay away from large cities and towns, and choose places without streetlights or other artificial lighting. Which isn't easy these days.
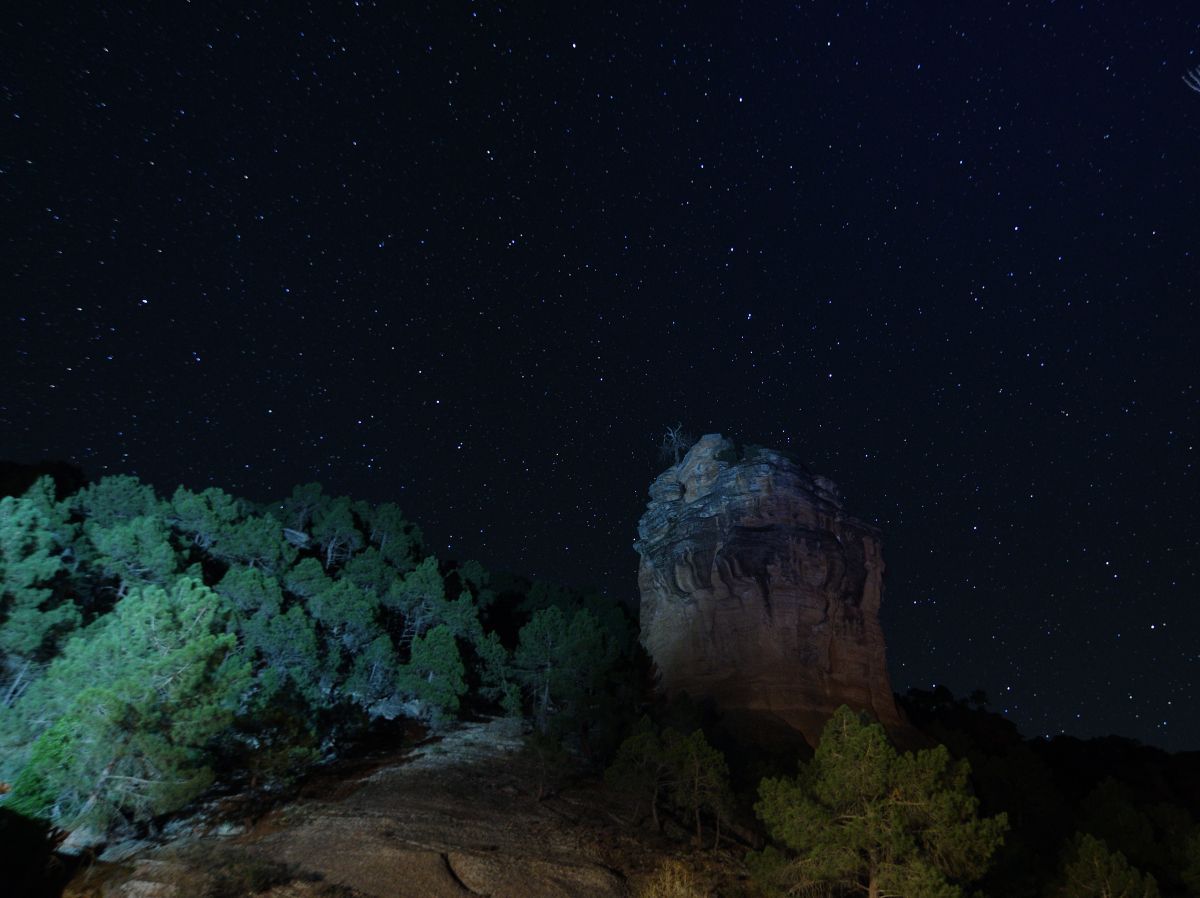
And if not, pay attention to the previous image, in which spotlights on a nearby facade burned part of the vegetation. Despite seeing those spotlights in the frame, after a 20-second exposure, the lanterns' light burned part of the trees. The rock looks illuminated because I illuminated it just enough with a flashlight, but I couldn't control the amount of light (or the duration of the light) the trees received from the lanterns.
The second step, once the foreground subject has been chosen, is frame well, taking up a large portion of the celestial vault. What interests us is the contrast between the subject in the foreground (usually motionless) and a large portion of the starry sky.
Once the frame is chosen, I do theat first test. I open the camera diaphragm as much as possible (I usually use lenses with apertures of 2.8 or even 1.8) I raise the ISO value to 1600 or even 3200, and I try with an exposure value of a few seconds, until I find the combination that convinces me, in which I see many stars, I haven't burned anything, but I don't see anything underexposed either.
In night photography, look at the histogram It doesn't usually mean much to me, personally, although I know there are other photographers who have their quirks and calculations about what a perfect histogram should look like in night photography. For my part, I understand that there are many variables that influence the histogram, stray lights, contamination... so I try to be guided by one visual hunchIf I see that my photo is fine at f/2.8, ISO 1600 and 2 seconds of exposure... well, I stick with those values.
Once I have those parameters determined, it's a matter of applying the law of reciprocityIn this case, I start lowering the ISO to reduce digital noise in the photo, but above all, because by lowering the ISO, I can increase the exposure time. And if I increase the exposure time, I can use small flashlights to illuminate the foreground or the darkest points in my frame.

Imagine that in this table I erase the shutter speed (or exposure time) values. And once erased, just below the ISO 1600 box, I enter the time I used in my photo, the one I mentioned in the previous paragraphs, 2 seconds. Now it's time to lower the camera's ISO, so that every time I lower the ISO one step (one of the boxes, from 1600 to the left), I'll have to increase the exposure time one step (doubling the previous exposure value).
That is, if at ISO 1600 I used 2 seconds, at ISO 800 I will use 4 seconds... and at ISO 100.... 32 seconds of exposure.
Of course there is a limit to the exposure time. If we exceed that limit, the stars will no longer appear as static points and we will see trails. There is a rule more or less accepted by photographers that says that the limit for exposure time is obtained by dividing 500 by the focal length you are using, if you use a full-frame camera. If you use an APSC format camera, like me, you have to divide 300 by your focal length.
I use focal lengths between 11 and 17 millimeters, so my limits (rounding) would be 300/11mm = 27 seconds and 300/17mm = 18 seconds.
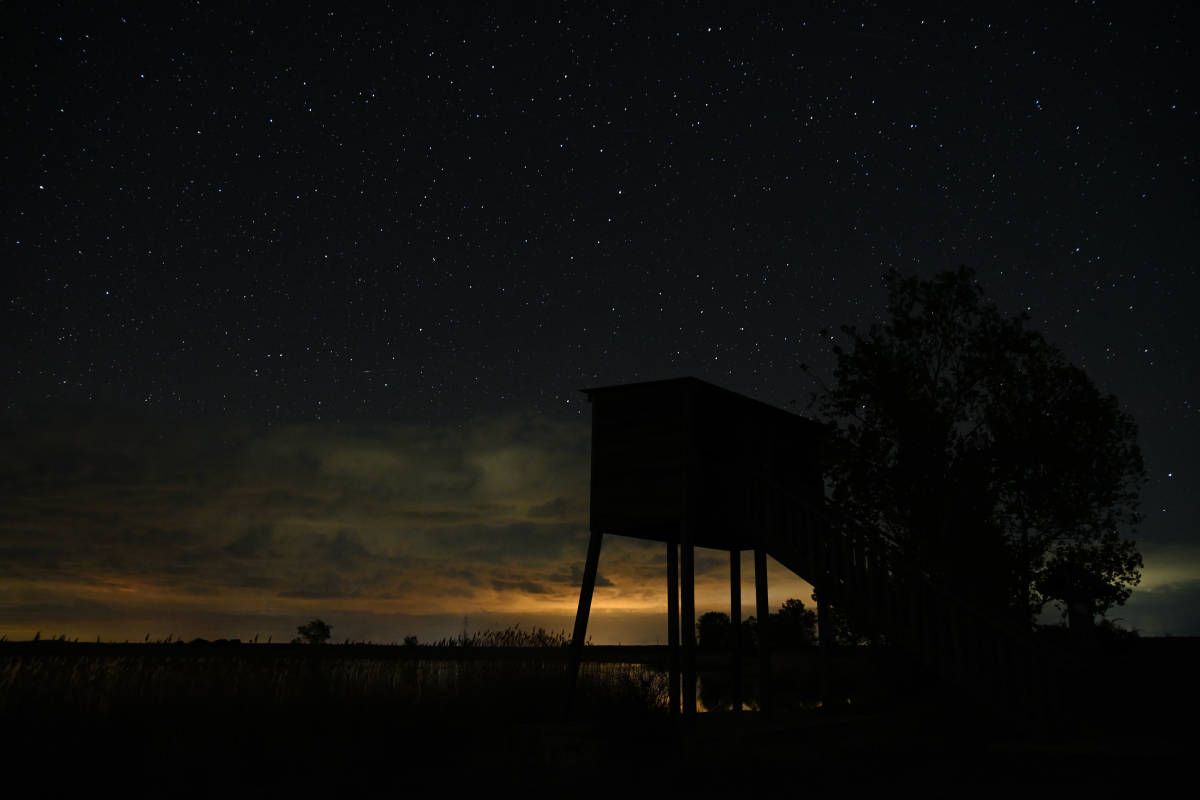
This is the last question we should ask ourselves. Once I reduce the ISO and test with the new exposure value, I'll see the stars very well, but the foreground will most likely be very dark, like the photo I posted above with the completely dark observation tower.
Some of the night photographs we have taken these days in the Natural Park of #altotajoNote that all of these photos have been subjected to no post-processing or editing, except for the circumpolar ones, which have simply been stacked using software, without any further alteration.
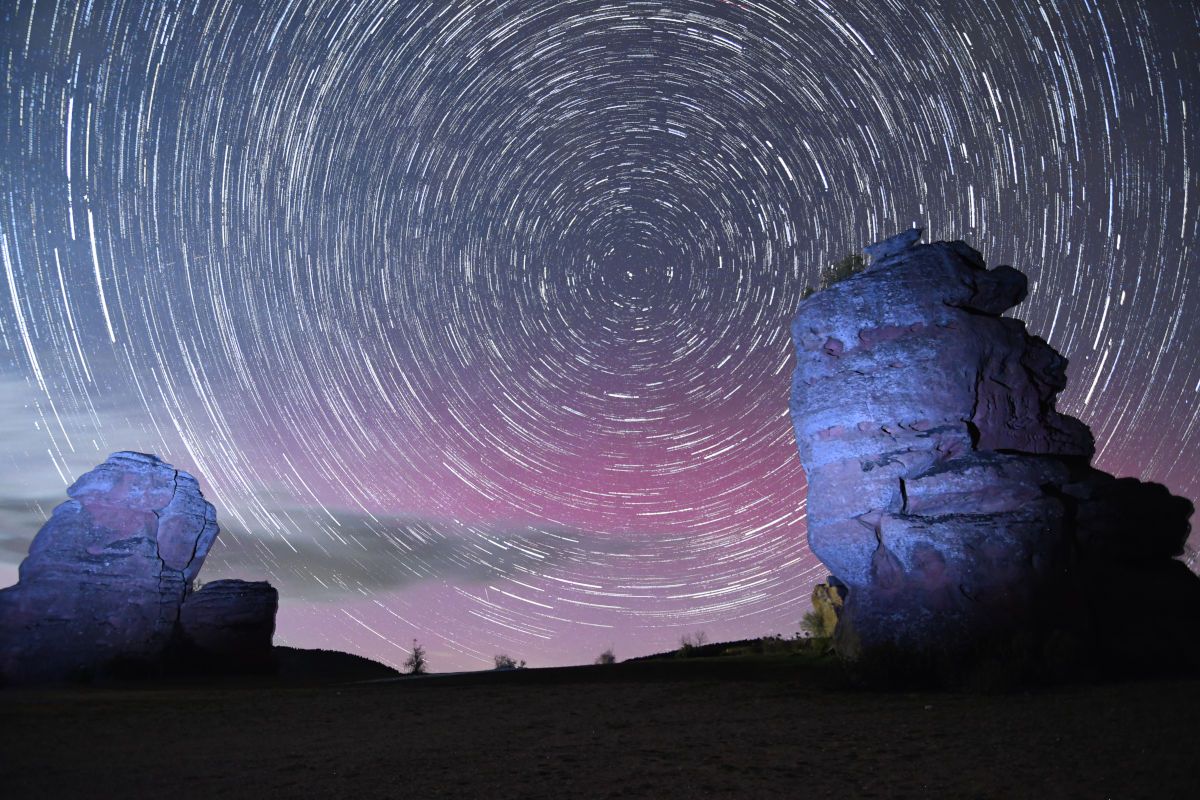
The second technique I chose involved focusing the camera to the north, searching the plane for the North Star, and taking dozens... hundreds of photographs to stack on top of each other looking for star trails... in this case I would get a circumpolar photography, which is when we see the effect of the stars rotating in a circle around the North Star, which during the night, in our hemisphere, does not change position.
The secret here is to play with the ISO and exposure so that each of the individual photos we take is slightly underexposed. Because later, we'll stack them on top of each other, using photography software, to capture the stars' trails as they move. Each photo we stack will add a little bit of light to the final result. That's why my trick is to underexpose each individual photo.
For example, in the case of the circumpolar camera above, each photograph was taken at ISO 1600 and a 5-second exposure time.
We then programmed the camera to take the same photo, with the same parameters, every few seconds. In my case, I programmed it every 3 seconds. It's not advisable to leave too much time between photos, since with the movement of the stars, if we leave too much time between each photo, the lines will look less fluid. If you look at the circumpolar of the lagoon and the tree trunk, on that occasion I programmed the camera to leave 10 seconds between photos. That's why the lines look so strange.
Said and done. For this last photo I programmed the camera to Every 3 seconds, it will take a photo at ISO 1600 and 5 seconds exposure. Then I told him to make some to be calm 300 photos So, before turning off the camera. I think with 300 stacked photos, you'd see the almost complete circular traces of the stars.
Then I just had to put the 300 photos in a photography software (I use a free app called StarTrails) and magic potagia. The circumpolar photo is now complete.
This was the last technique I used during those three days (or nights) of nocturnal madness. I left a second camera focusing on the same subjects in the foreground (the lagoon in the first scene and the towers in the second) but focused to the east. The idea was to program the camera to take sequential photos, every few seconds, like in the photo stacking technique. But instead of stacking these photos into a single final image, I told the camera to transform all of them into a time-lapse video.
The parameters of each photo were the same as in the previous case. Take a photo at ISO 1600 and 5 seconds of exposure every 3 secondsThe result, from both locations, you have it in this video from my YouTube channel.
In this video I also explain a little more about these 3 techniques that I used during those days.
Friends, I hope you enjoy both this post and the video. And I hope you'll be inspired to try some of these photography techniques. Let me know if you do and show me the results; I'd love to see them and discuss them with you.
Greetings.